
For the past few months, I’ve been working on my Resources page, and the next step was to create a curated list of books I love.
So, I started with a quick prototype in Lovable.
I liked the structure, so the next question was about tools:
- JetEngine – for custom post types (“Books”), listing items, grids, and taxonomies (for book categories).
- JetSmartFilters – to make the books filterable by category.
Now, let’s dive into my step-by-step journey 👇
Table of Contents
Step 1: Create Custom Post Type for Books
Go to JetEngine → Post Types → Create New. Then fill out the basic settings (name, slug, etc.) – nothing complicated here.
Next, I created the meta fields I needed. From the screenshot, you can see each meta field’s name and type (text, number, textarea).
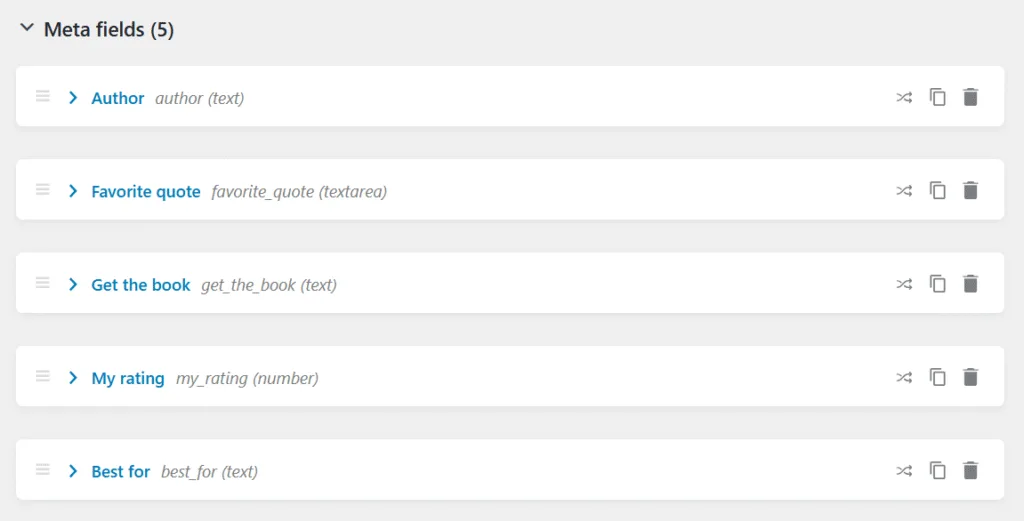
A few useful notes I discovered along the way:
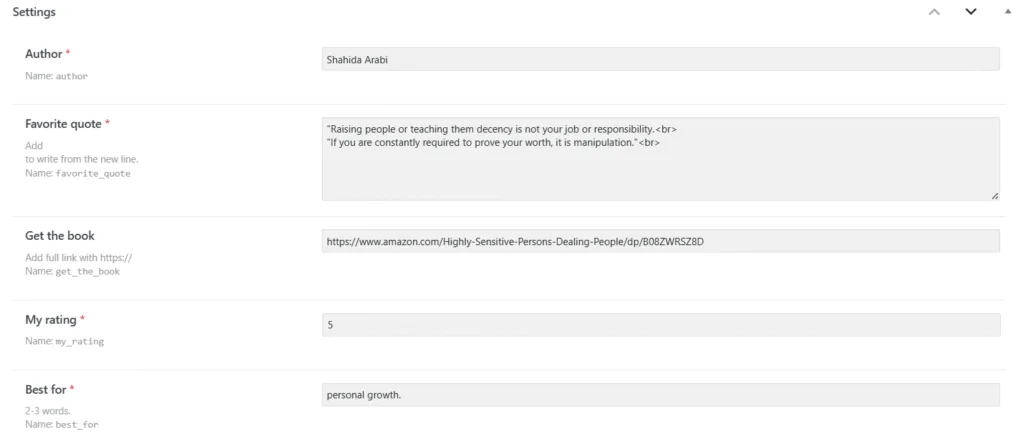
- I added a description to the Favorite quote field:
“Add <br> to write from a new line.” - For Get the book, I added:
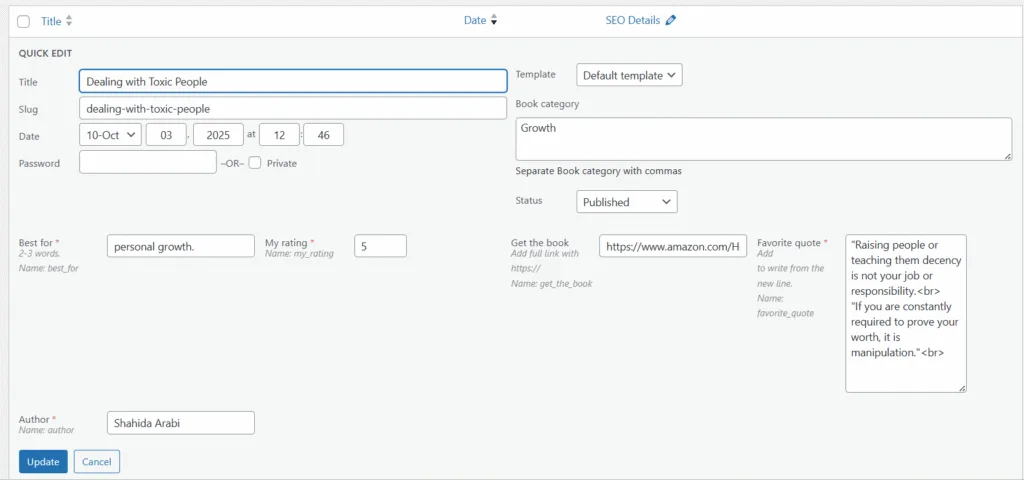
“Add full link with https://” - I also toggled Quick Edit for each meta field, so I can update them easily right from the dashboard.
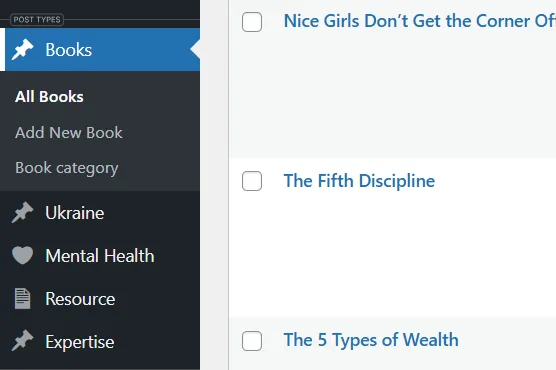
Once saved, the Books post type appeared in my dashboard 🎉
Now I can add new books and fill in all the details:
Or even edit them quickly without opening each CPT individually:
Step 2: Create taxonomy for Book category
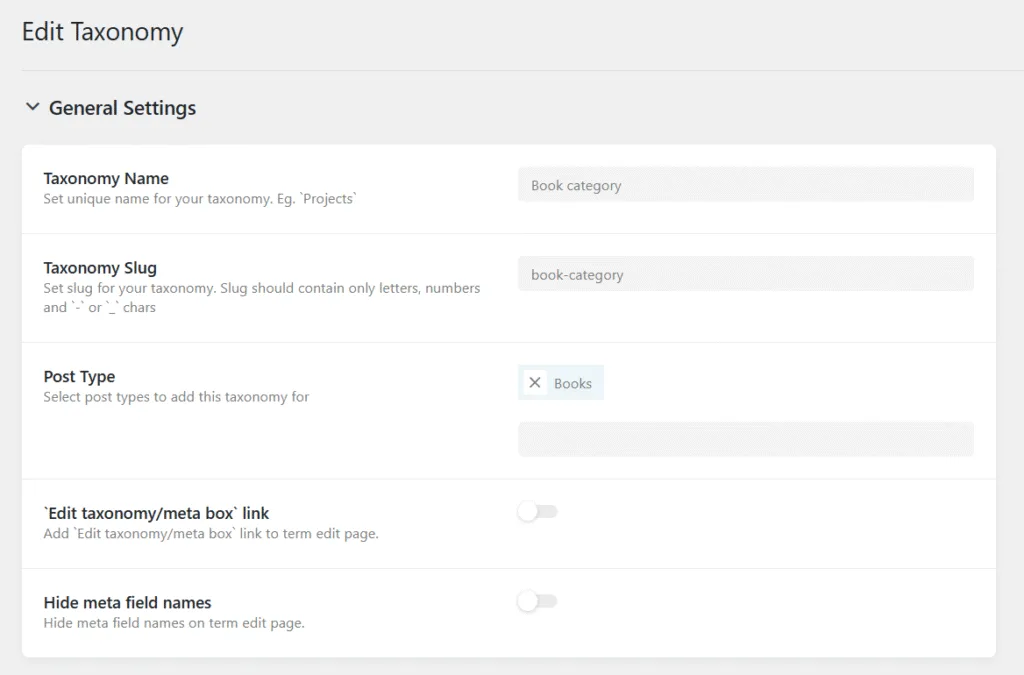
Go to JetEngine → Taxonomies → Add New.
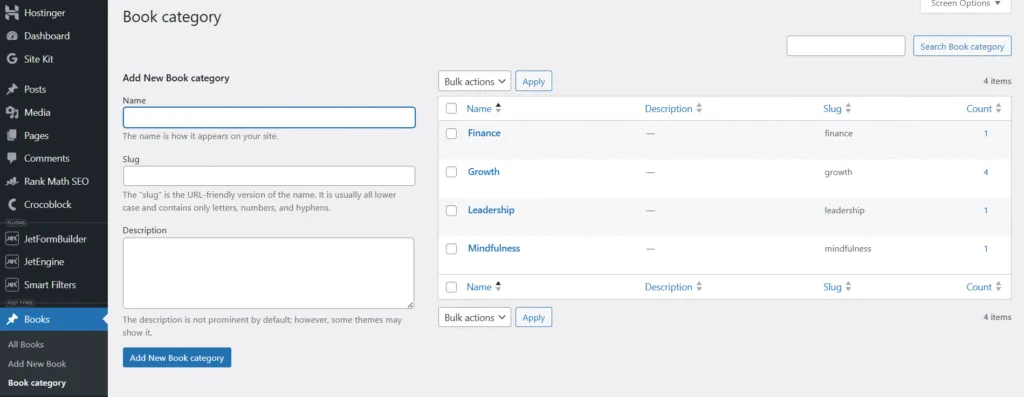
Now you can add new book categories either from Post Types → Book Category or directly while adding a new book (in the Category section).
Step 3: Create a Book listing item
Go to JetEngine → Listings → Add New Item.
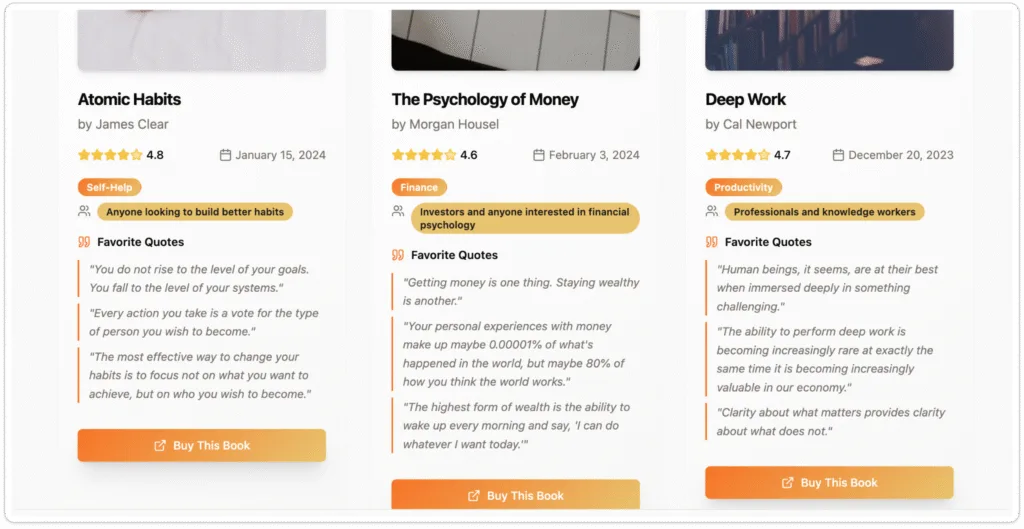
Here’s the basic structure of my listing item 👇
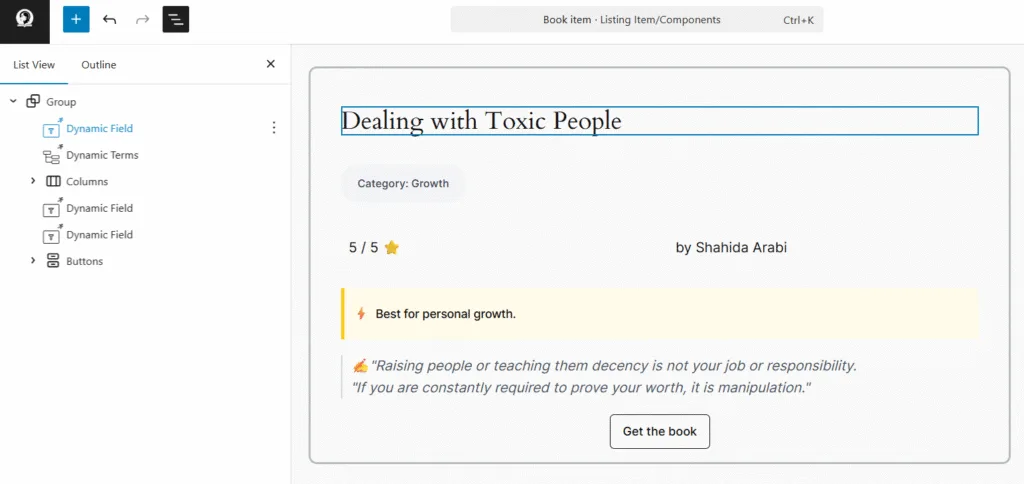
For styling, I asked ChatGPT for a bit of help (since JetEngine’s built-in styling options are somewhat limited in the WordPress editor).
It suggested adding the following CSS under Appearance → Editor → Styles → Additional CSS:
/* Category as badge */
.book-category {
  display: inline-block;
  background-color: #f3f4f6;
  color: #374151;
  font-size: 13px;
  font-weight: 500;
  padding: 4px 10px;
  border-radius: 20px;
  margin: 5px 0;
}

/* Best for block */
.book-bestfor {
  background-color: #fffbea;
  border-left: 4px solid #facc15;
  padding: 6px 10px;
  margin: 8px 0;
  font-size: 14px;
  font-weight: 500;
  display: flex;
  align-items: center;
  gap: 6px;
}
.book-bestfor::before {
  content: "⚡";
  font-size: 16px;
}

/* Quote styling */
.book-quote {
  font-style: italic;
  color: #4b5563;
  margin-top: 6px;
  padding-left: 10px;
  border-left: 2px solid #d1d5db;
}
Then, I added the corresponding CSS classes to each field I wanted to style.
Step 4: Create Books filter
Go to JetSmartFilters → Add New and create a filter for the Book category with the following settings:
- Filter type: Select
- Data source: Taxonomies
- Taxonomy: Book category
All other settings can stay as default.

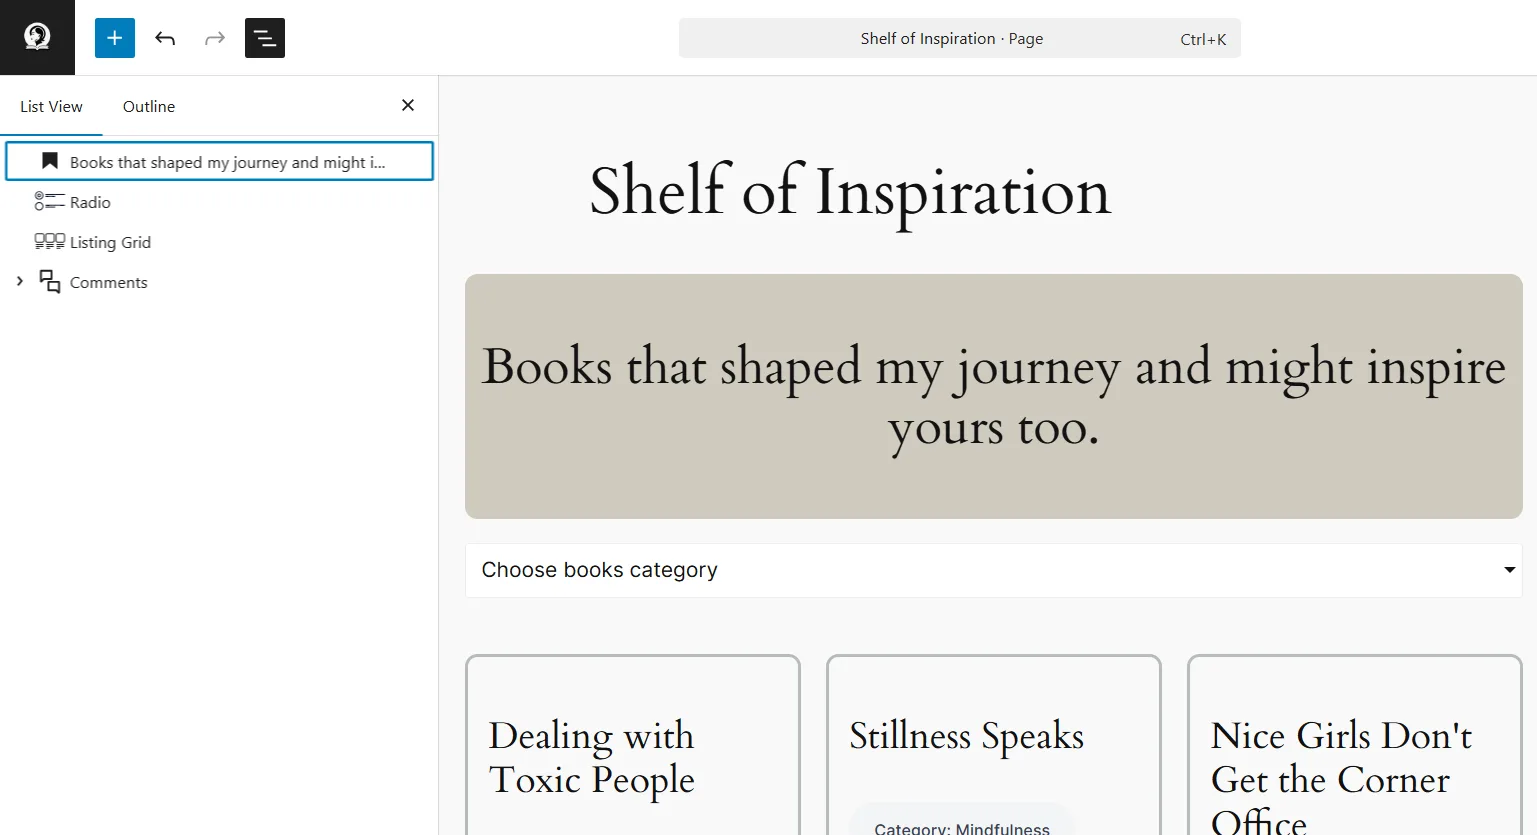
Step 5: Create Books page
Go to Pages → Add New and build your layout. Here’s what I added to my page:
- Heading
- Subheading
- Filtering option
- Listing grid with books
- Comments section
I thought it would be nice to let others share their feedback or book recommendations right on this page.
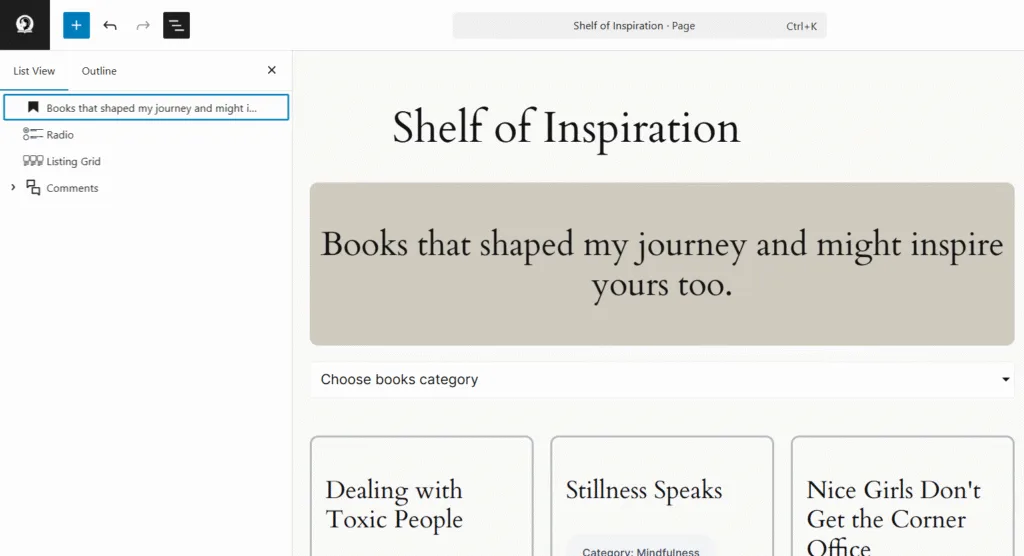
Here are some of my Listing Grid settings (which might be useful):
- Listing: Book item
- Columns: 3
- Columns (tablet): 2
- Columns (mobile): 1
- Toggles: Lazy Load, Equal Column Height
Conclusion
And that’s it – the page is ready to explore ✨
I plan to add only books that truly matter to me – those that inspire, impress, or teach me something new.
I hope this tutorial was helpful! Feel free to leave any comments, feedback, or questions below – I’ll be happy to help.
Leave a Reply